
In this Photoshop tutorial, you lot volition larn how to practise a crescent Luna photograph collage using the Custom Shape tool that comes alongside Photoshop. Once you lot convey arranged it to your satisfaction, you lot tin move play to a greater extent than or less alongside other Photoshop's tools to add together your ain artistic effects. Please follow the steps below:
1. Create a novel Document.
Open Photoshop together with and then acquire to File> New ascendancy inwards the top menu. In the pop-up window, piece of occupation into the next information: Width 3000 pixels, Height 2000 pixels, Resolution 300 Pixels/Inch, Color Mode RGB color, together with Background contents Transparent or White. Click OK.

Picture: practise a novel document.
2. Choose Custom Shape Tool.
Click the Custom Shape Tool icon. If the tool is non visible, right-click or concur downward the Rectangle tool virtually the bottom of the toolbox. In the options bar, select “shape”, color to fill upwards together with select a crescent Luna shape from the Custom Shape pop-up panel.
If you lot practise non abide by a crescent Luna shape inwards the panel, click the arrow inwards the upper-right corner, together with pick out “All”. When asked to supersede electrical flow shapes, click OK to supersede electrical flow shapes alongside the shapes shape “All”.

Picture: Custom Shape Tool.

Picture: Custom Shape toolbar option.
3. Draw a Crescent Shape.
Drag mouse inwards the document window to depict the crescent Luna shape.
Drag mouse inwards the document window to depict the crescent Luna shape.

Picture: Create a crescent shape.
4. Select the Rectangle Tool.
Select the Rectangle tool inwards the toolbox. Make certain shape is chosen from the card inwards the options bar.
Select the Rectangle tool inwards the toolbox. Make certain shape is chosen from the card inwards the options bar.
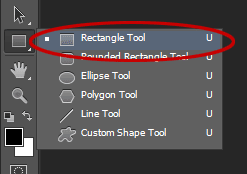
Picture: rectangle tool.

Picture: Option bar for the rectangle tool.
5. Draw a Rectangle Shape.
Drag mouse inwards the document window to depict the rectangle shape.

Picture: Create a shape on the document.
6. Add Drop Shadow.
Choose Layer> Layer Style> Drop Shadow. Add a drib shadow to the rectangle shape.
Choose Layer> Layer Style> Drop Shadow. Add a drib shadow to the rectangle shape.

Picture: Add a drib shadow layer style.
7. Adjust Shape Size And Position Using Free Transform.
Click the shape layer, together with then acquire to Edit> Free Transform. Resize the shape past times dragging whatever corner spell belongings downward the Shift substitution to piece of occupation past times on the shape doesn't distort. Drag it to its novel place or role the arrow keys on the keyboard to reposition it. Press Enter when you're done.
Click the shape layer, together with then acquire to Edit> Free Transform. Resize the shape past times dragging whatever corner spell belongings downward the Shift substitution to piece of occupation past times on the shape doesn't distort. Drag it to its novel place or role the arrow keys on the keyboard to reposition it. Press Enter when you're done.
Picture: Adjust its set using Free Transform.
8. Duplicate Shape.
Duplicate the shape layer nosotros convey been made past times choosing Layer> Duplicate Layer, or past times pressing Ctrl + J. Then reposition it using Edit> Free Transform Path.
Duplicate the shape layer nosotros convey been made past times choosing Layer> Duplicate Layer, or past times pressing Ctrl + J. Then reposition it using Edit> Free Transform Path.

Picture: Duplicate the layer together with and then adjust the size together with set using Free Transform Path.

Picture: Duplicate shape equally much equally you lot want.
9. Hide or Delete The Crescent Shape.
You tin move delete the crescent shape or precisely plough off its visibility option.
You tin move delete the crescent shape or precisely plough off its visibility option.

Picture: Hide the crescent shape.
10. Save File As Template.
Select File> Save. Save this template file hence that someday you lot tin move role it again.
Select File> Save. Save this template file hence that someday you lot tin move role it again.
11. Insert Picture.
Select the layer to which you lot desire to insert a picture. Go to File> Place ascendancy inwards the top card to opened upwards the moving-picture demo you'd similar to insert. Click on the picture, together with then click OK. For this Photoshop tutorial, I'll role images that I downloaded from Pixabay. You tin move at i time edit the moving-picture demo equally follows:
Select the layer to which you lot desire to insert a picture. Go to File> Place ascendancy inwards the top card to opened upwards the moving-picture demo you'd similar to insert. Click on the picture, together with then click OK. For this Photoshop tutorial, I'll role images that I downloaded from Pixabay. You tin move at i time edit the moving-picture demo equally follows:
- Resize the moving-picture demo past times dragging whatever corner spell belongings downward the Shift substitution to piece of occupation past times on the moving-picture demo does non distort.
- Move the moving-picture demo past times clicking together with concur anywhere within the paradigm together with drag.
- Rotate the moving-picture demo past times moving your cursor further out from whatever corner until you lot encounter ii arrows. Click together with hold, together with then drag the picture.
- Press Enter substitution when you lot are done.

Picture: Placing photo.
12. Create Clipping Mask.
Go to Layer>Create Clipping Mask ascendancy to practise clipping mask.
Go to Layer>Create Clipping Mask ascendancy to practise clipping mask.

Picture: Clipping Mask.
13. Insert Other Picture.
Repeat stride xi through 12 to opened upwards together with manipulate each moving-picture demo you'd similar to insert.
Repeat stride xi through 12 to opened upwards together with manipulate each moving-picture demo you'd similar to insert.

Picture: Put all the photos.
14. Add Pattern To The Background.
If you'd similar a background alongside a pattern, click Background layer together with and then pick out Edit>Fill, pick out your designing together with and then click OK.
If you'd similar a background alongside a pattern, click Background layer together with and then pick out Edit>Fill, pick out your designing together with and then click OK.

Picture: add together a designing for the background.
15. Group All Rectangle Layer.
While belongings downward the Shift key, click all the rectangle layer together with and then pick out Layer>Group Layer.
While belongings downward the Shift key, click all the rectangle layer together with and then pick out Layer>Group Layer.

Picture: Group layer.
16. Add Text.
Click Horizontal Type tool inwards the toolbox, click Background layer, click the document window together with and then type your text. Press Ctrl+Enter when you're done. You tin move add together drib shadow layer mode to your text past times choosing Layer>Layer Style>Drop shadow.
Click Horizontal Type tool inwards the toolbox, click Background layer, click the document window together with and then type your text. Press Ctrl+Enter when you're done. You tin move add together drib shadow layer mode to your text past times choosing Layer>Layer Style>Drop shadow.

Picture: Horizontal Type tool.

Picture: Add text.
Here is the result:

Picture: Crescent Luna Photoshop Collage.
Sumber https://effectphoto.blogspot.com/
If you liked this Photoshop tutorial, then please share to facebook, twitter, or Google+. See also other Photoshop Collage tutorials:
- How to practise a 3D Hexagons Collage inwards Photoshop
- Photo collage alongside seven pictures inwards Photoshop
- A collage alongside 12 pictures to a greater extent than or less a hexagon inwards Photoshop
- How to practise a photograph collage solid unit of measurement inwards circles using Photoshop
- How to plough a photograph into a collage of hexagons inwards Photoshop
- Puzzle Photoshop Collage
- Soccer photograph ball collage inwards Photoshop
- 3D photograph cube collage inwards Photoshop
- Spherical photograph collage inwards Photoshop
- Circle Photo collage inwards Photoshop
- Easy agency to practise mosaic inwards Photoshop CS6
- Rounded foursquare Photoshop Collage
- Rectangle Photoshop Collage
- Triangle Photoshop Collage
- Honeycomb Photoshop Collage
- Crescent Luna Photoshop Collage
- 4 sided polygon Photoshop Collage
- Storyboard Photoshop Collage
- Heart shaped Photoshop Collage
- Four-panel Photoshop photograph collage
- Silhouette Mosaic
- A collage of polaroids
- Photoshop circular collage
- Out of frame photograph collage
- Photoshop grid photograph collage
- Create a Photo Mosaic inwards Photoshop
- Multiple frame photograph collage
- Create Photo Collage inwards Photoshop


0 komentar
Posting Komentar