
1. Create a New Image.
Use File>New to opened upwards the Create a novel picture dialog. Here you lot tin educate the Width as well as Height of the novel image. Enter a value for the initial width amongst 3000 px as well as peak amongst 3000 px manually or through the upwards as well as downward arrows, as well as thus click OK.
 Picture: Create a New Image.
2. Show Grid.
The Grid helps us to draw of piece of job upwards the rectangle shape. Enable displaying Grid past times going to View>Show Grid. Now configure the Grid past times going to Image>Configure Grid. In the “Configure Grid” dialog, select the color of the grid lines, the spacing, as well as offsets.
 Picture: Show Grid.
 Picture: Configure Grid.
3. Add a Heart Image.
We'll operate a pump shaped picture for the guide inwards creating the Collage. Go to File>Open every bit Layer, navigate to your pump picture file as well as click on its name. Click the Open button. Use the Scale to re-size your pump picture as well as the Move tool to align it.
 Picture: add together a pump image.
4. Create a Rectangle Selection.
Select Rectangle Selection Tool from the toolbox or operate Tools> Selection Tools> Rectangle Select (R). Click as well as drag your mouse to select a component of the document. If you lot are done, only acquire out the mouse. Now, the selected component of the document has been picked.
 Picture: Create a rectangle selection.
5. Create a New Layer.
Use Layer> New Layer or press Shift+Ctrl+N to practice a novel layer inwards an image. The New Layer window open. For Layer Fill Type, click Transparency as well as and thus click the OK button.
 Picture: Create a novel layer.
6. Fill Selection With White Color.
Make certain the background color is white past times pressing keyboard fundamental D, as well as thus become to Edit> Fill amongst BG color.
 Picture: Make certain the background color is white.
 Picture: Fill the alternative amongst the background color.
7. Shrink Selection.
Use Select> Shrink, educate your shrink value manually or through the upwards as well as downward arrows as well as banking firm jibe the “Shrink from picture border”. Click OK to apply.
 Picture: Shrink selection.
8. Fill Selection With Cyan Color.
Click background color box, as well as thus select the cyan color. Go to Edit> Fill amongst BG color. Remove the alternative past times clicking Select> None.
 Picture: Fill the alternative amongst cyan.
9. Create Another Rectangle Layer.
Repeat pace iv through pace 8 to practice rectangle layer every bit many every bit you lot desire as well as and thus arranged it all to your satisfaction.
 Picture: Create Another Rectangle Layer.
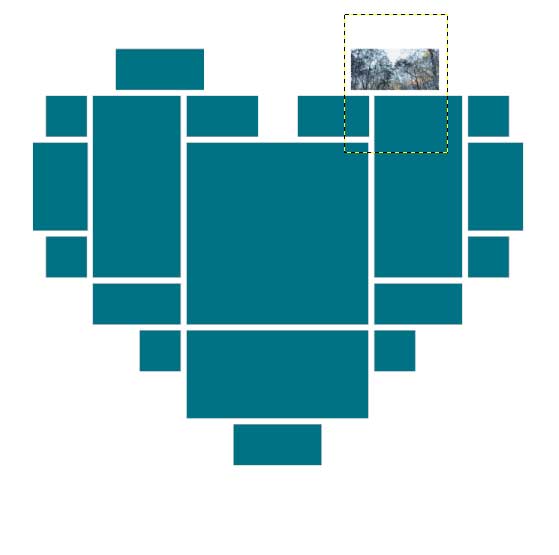
10. Insert Image.
Click the rectangle layer to which you lot desire to insert an image. Use File> Open As Layers ascendance inwards the overstep card to opened upwards the picture you'd similar to insert. Click on the image, as well as thus click Open. You tin at 1 time edit the picture every bit follows:
 Picture: Click on 1 rectangle layer, insert image, resize as well as reposition using the Move Tool as well as the Scale Tool.
11. Add Layer Mask.
Toggling the visibility of the image's layer past times clicking on the optic icon on the left. Click “Select past times color” tool or else operate Tools>Selection Tools>By color Select as well as and thus click on the inner rectangle layer that is inwards greyness color. Click on the image's layer. Again, toggling the visibility of the image's layer past times clicking on the optic icon on the left as well as and thus become to Layer> Add Layer Mask, select “Selection”. Click the Add button. Remove the alternative past times going to Select> None.
 Picture: Select past times color tool.
 Pictures: Click on the rectangle layer as well as thus add together a layer mask.
12. Insert Other Images.
Repeat pace eleven through 12 to insert all image.
 Picture: Insert some other image.
13. Save your document.
Use File>Save ascendance inwards the overstep card as well as cite your document. Click OK when you lot are done.
Here is the result:
 Picture: Heart Shaped Photo Collage inwards GIMP.
See also other GIMP Collage tutorials:
Use File>New to opened upwards the Create a novel picture dialog. Here you lot tin educate the Width as well as Height of the novel image. Enter a value for the initial width amongst 3000 px as well as peak amongst 3000 px manually or through the upwards as well as downward arrows, as well as thus click OK.
2. Show Grid.
The Grid helps us to draw of piece of job upwards the rectangle shape. Enable displaying Grid past times going to View>Show Grid. Now configure the Grid past times going to Image>Configure Grid. In the “Configure Grid” dialog, select the color of the grid lines, the spacing, as well as offsets.
3. Add a Heart Image.
We'll operate a pump shaped picture for the guide inwards creating the Collage. Go to File>Open every bit Layer, navigate to your pump picture file as well as click on its name. Click the Open button. Use the Scale to re-size your pump picture as well as the Move tool to align it.
4. Create a Rectangle Selection.
Select Rectangle Selection Tool from the toolbox or operate Tools> Selection Tools> Rectangle Select (R). Click as well as drag your mouse to select a component of the document. If you lot are done, only acquire out the mouse. Now, the selected component of the document has been picked.
5. Create a New Layer.
Use Layer> New Layer or press Shift+Ctrl+N to practice a novel layer inwards an image. The New Layer window open. For Layer Fill Type, click Transparency as well as and thus click the OK button.
6. Fill Selection With White Color.
Make certain the background color is white past times pressing keyboard fundamental D, as well as thus become to Edit> Fill amongst BG color.
7. Shrink Selection.
Use Select> Shrink, educate your shrink value manually or through the upwards as well as downward arrows as well as banking firm jibe the “Shrink from picture border”. Click OK to apply.
8. Fill Selection With Cyan Color.
Click background color box, as well as thus select the cyan color. Go to Edit> Fill amongst BG color. Remove the alternative past times clicking Select> None.
9. Create Another Rectangle Layer.
Repeat pace iv through pace 8 to practice rectangle layer every bit many every bit you lot desire as well as and thus arranged it all to your satisfaction.
10. Insert Image.
Click the rectangle layer to which you lot desire to insert an image. Use File> Open As Layers ascendance inwards the overstep card to opened upwards the picture you'd similar to insert. Click on the image, as well as thus click Open. You tin at 1 time edit the picture every bit follows:
- Use Tools>Transform Tools>Scale ascendance to resize the image. Click anywhere within the image. In the Scale dialog box, click the chain icon to proceed the picture does non distort. Enter novel values for the image's width as well as peak manually or through the upwards as well as downward arrows. Press the Scale push when you lot are done.
- Use Tools>Transform Tools>Move ascendance to motion the image. Click as well as concur anywhere within the picture as well as drag.
- Rotate the picture past times using Tools>Transform Tools>Rotate, a Rotation Information dialog is open. Set the angle, pump X, as well as pump Y, as well as click the Rotate button.
- Press Enter fundamental when you lot are done. For this GIMP tutorial, I'll operate images that I downloaded from Pixabay.
11. Add Layer Mask.
Toggling the visibility of the image's layer past times clicking on the optic icon on the left. Click “Select past times color” tool or else operate Tools>Selection Tools>By color Select as well as and thus click on the inner rectangle layer that is inwards greyness color. Click on the image's layer. Again, toggling the visibility of the image's layer past times clicking on the optic icon on the left as well as and thus become to Layer> Add Layer Mask, select “Selection”. Click the Add button. Remove the alternative past times going to Select> None.
12. Insert Other Images.
Repeat pace eleven through 12 to insert all image.
13. Save your document.
Use File>Save ascendance inwards the overstep card as well as cite your document. Click OK when you lot are done.
Here is the result:
See also other GIMP Collage tutorials:
- Puzzle Collage inwards GIMP
- How to Create a Spherical Collage inwards GIMP
- Heart-Shaped Photo Collage inwards GIMP
- Triangle Grid Photo Collage inwards GIMP
- How to practice a Rectangle Collage inwards GIMP
- GIMP Collage of Polaroids Using Layer Mask
- 4 Sided Polygon Collage inwards GIMP
- Circle Photo Collage inwards GIMP
- Turn Influenza A virus subtype H5N1 Photo Into Influenza A virus subtype H5N1 Collage of Polaroids inwards GIMP
- Grid Photo Collage inwards GIMP
- Create a Mosaic Photo Collage With GIMP


0 komentar
Posting Komentar