
Video: Tutorial How To Create a Neon Text Effect In Photoshop.
1. Open a Background Image.
Choose File> Open to Open upward your background picture inward Adobe Photoshop. For this Photoshop tutorial, I'll run this picture that I downloaded from CGtextures.

Picture: Open photo.
2. Duplicate Layer.
Duplicate the Background layer yesteryear going to Layer>Duplicate Layer. The duplicate volition seem higher upward the original.
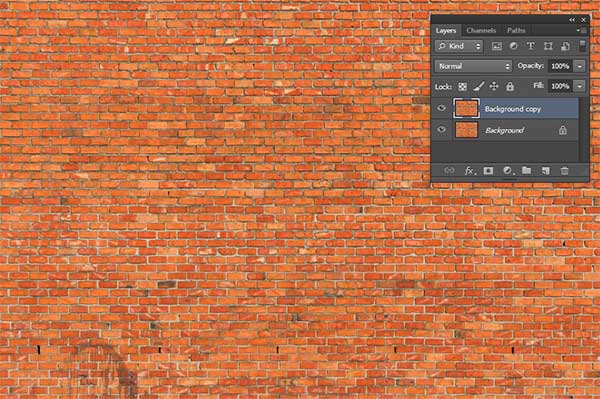
Picture: Duplicate Layer.
3. Apply Levels Adjustment.
Click the duplicate layer (in this representative the Background re-create layer). Go to Layer>New Adjustment Layer>Levels. Click OK when a novel layer window pops up. Darken the shadows yesteryear moving the dark input shadows slider to the right. Darken the Output Highlights yesteryear moving the white output highlights slider to the left.

Picture: Apply Levels Adjustment.
4. Type Your Desired Text.
Choose the Horizontal Type Tool. On the Options bar, pick out a font family, pick out a font style, pick out or acquire inward a font size together with click the Text Color swatch thus pick out a coloring cloth via the coloring cloth picker or Swatches panel thus click OK.
Click inward the document to found an insertion point, thus type your desired text. To convey the novel text, press Ctrl+Enter or click the Commit push on the correct destination of the Options bar. Each fourth dimension you lot exercise a novel type alongside the Horizontal Type tool, it volition seem on a novel layer.
Scale type using Free Transform yesteryear going to Edit>Free Transform. You tin straight off scale your type equally follows:
- Drag a side grip if you lot wishing to scale but the meridian or width of the type.
- Drag a corner grip if you lot wishing to scale both the meridian together with the width of the type.
- Shift-drag a corner grip to save the master proportions of the characters piece scaling them.
- Click the Commit push on the Options bar to convey the scale transformation.

Picture: Type your desired text.
Picture: Scale type via Edit>Free Transform command.
5. Rasterize Text.
Because nosotros wishing to edit type, nosotros receive got to convert it to pixels starting fourth dimension via the Rasterize Type command. Choose Layer>Rasterize>Type.

Picture: Rasterize text.
6. Load Pixels.
Create a alternative yesteryear selecting all the nontransparent areas on the type layer, Right-click on the type layer thus pick out Load Pixels or but Ctrl+click the type layer.
Picture: charge pixels.
7. Contract Selection.
Now acquire to Select>Modify>Contract, I volition ready the Contract yesteryear 12 pixels. Click OK.

Picture: Contract selection.
8. Clear Selection.
Go to Edit>Clear or but press the Delete keypad. Choose Select>Deselect to take away the selection.
Picture: Clear selection.
9. Add Layer Style.
Click the Text layer thus acquire to Layer>Layer Style>Outer Glow to opened upward the Outer Glow Layer Style dialog. Apply the Inner Glow, Outer Glow together with Drop Shadow effects, using the settings shown below:

Picture: the Inner Glow setting.

Picture: the Outer Glow setting.

Picture: the Drop Shadow setting.
10. Load Pixels.
Right-click on the type layer thus pick out Select Pixels or but Ctrl+click the type layer.
Picture: Load pixels.
11. Expand Selection.
Now acquire to Select>Modify>Expand, I volition ready the Expand yesteryear 12 pixels. Click OK.

Picture: Expand selection.
12. Refine Selection.
Refine the alternative yesteryear going to Select>Refine Edge. Alter the Feather slider to the right. Choose Output to Selection. Click OK.

Picture: Refine the selection.
13. Create a New Layer.
Create a novel layer yesteryear going to Layer> New Layer. Drag the novel layer correct below the type layer.

Picture: Create a novel layer.
14. Create Light Reflection on the Wall.
Click the novel layer. Select the Brush Tool from the Toolbox, pick out a soft Brush, pick out a Foreground coloring cloth together with thus brush your mouse on the selection. Remove the alternative yesteryear going to Select>Deselect together with thus alter the layer's blend agency to Color Dodge. You tin alter the layer's opacity to 60%.

Picture: Create low-cal reflection on the wall.
15. Save your document.
Go to File>Save ascendence inward the live yesteryear card together with refer your document. Click OK when you lot are done.
And hither is the result:

Picture: How to exercise a neon text number inward Photoshop.
Sumber https://effectphoto.blogspot.com/


0 komentar
Posting Komentar