In this tutorial nosotros volition learn you lot how to brand a countdown timer. It is real slow in addition to ane has to order real less fourth dimension to brand it, it is fashionable in addition to attractive. Let us start this tutorial only earlier that cause got a await at the icon that what nosotros volition brand inward this tutorial:

Follow the nether given steps to consummate the to a higher house chore every bit shortly every bit possible:
Step 1: Make a novel document in addition to order it size 500 x 500, directly re-create the below icon in addition to laid upwardly it every bit the background of the image.

Step 2: One must brand a document such that all its layers are clearly visible in addition to if mortal wants to edit it in addition to thence he can, nosotros volition brand our inward such a manner that volition hold upwardly easily understandable past times anyone if he has basic noesis of Photoshop in addition to thence too. Now practice a novel layer in addition to depict a circular rectangle using the tool rounded rectangle tool, laid upwardly the radius of the cast every bit 5px in addition to cause got its width every bit 100px. Now become to blending options in addition to apply next styles inward it, lead the slope color to hold upwardly #1b1b1b for starting in addition to middle color every bit #373737 in addition to ending color every bit #1b1b1b.


Step 3: Again practice a novel layer in addition to depict a rectangle using dark color. Now become to “Mask” in addition to select the “Create Clipping Mask”, directly in ane lawsuit to a greater extent than become to the “Gradient overlay” using the blending options in addition to lead the slope color every bit #1b1b1b for starting in addition to middle color every bit #373737 in addition to ending color every bit #1b1b1b.

Step 4: Now banking firm fit out this, this is the nearly interesting business office of the whole tutorial that is creating a lite outcome on the countdown. The real starting fourth dimension matter you lot cause got to practice is zoom the icon to 1600% or 3200% in addition to and thence become to the carte du jour tools in addition to lead pen tool in addition to depict the path of the dots every bit given below:
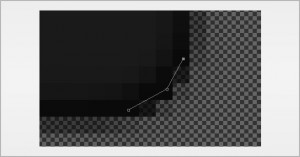
Step 5: Now lead the brush tool in addition to laid upwardly its diameter to 1px in addition to 0% hardness, click the pen tool in addition to Rasterize the layer, click on the selection in addition to become similar Stroke Path -> Brush every bit a Stroke Path, click the path in ane lawsuit to a greater extent than in addition to press Delete Path, directly become similar Filter -> Gaussian Blur in addition to laid upwardly it 0.5 in addition to opacity to 50%, you lot volition get:

Step 6: Copy the lite layer in addition to movement it to bottom in addition to role “Flip” if required. Now you lot cause got to re-create the newly made layer 2 times in addition to movement the novel layer a fiddling downward, it volition order you:

Step 7: Now lead the “Text Tool” in addition to write the numbers using the font of your selection in addition to apply the next styles, lead the slope color every bit #c3c3c3 for starting, white for middle in addition to #c3c3c3 for end.


Step 8: Now you lot cause got to alone duplicate the layer in addition to write the numbers on it, nosotros cause got made 2 to a greater extent than for you lot in addition to you lot volition larn terminal outcome as:

Author: Aayushi Jain Sumber http://anotherphotoshopblog.blogspot.com


0 komentar
Posting Komentar