hey Guys : this is my good done Tutorial of how you lot tin forcefulness out brand your ain outcry upwards
of course of written report every trunk dreamed of the magical outcry upwards : accessoires as well as anything else
of course of written report every trunk dreamed of the magical outcry upwards : accessoires as well as anything else
you tin forcefulness out add
could you lot exercise that . good it turns out that this is really easy
as well as hither i exhibit you lot how to exercise it
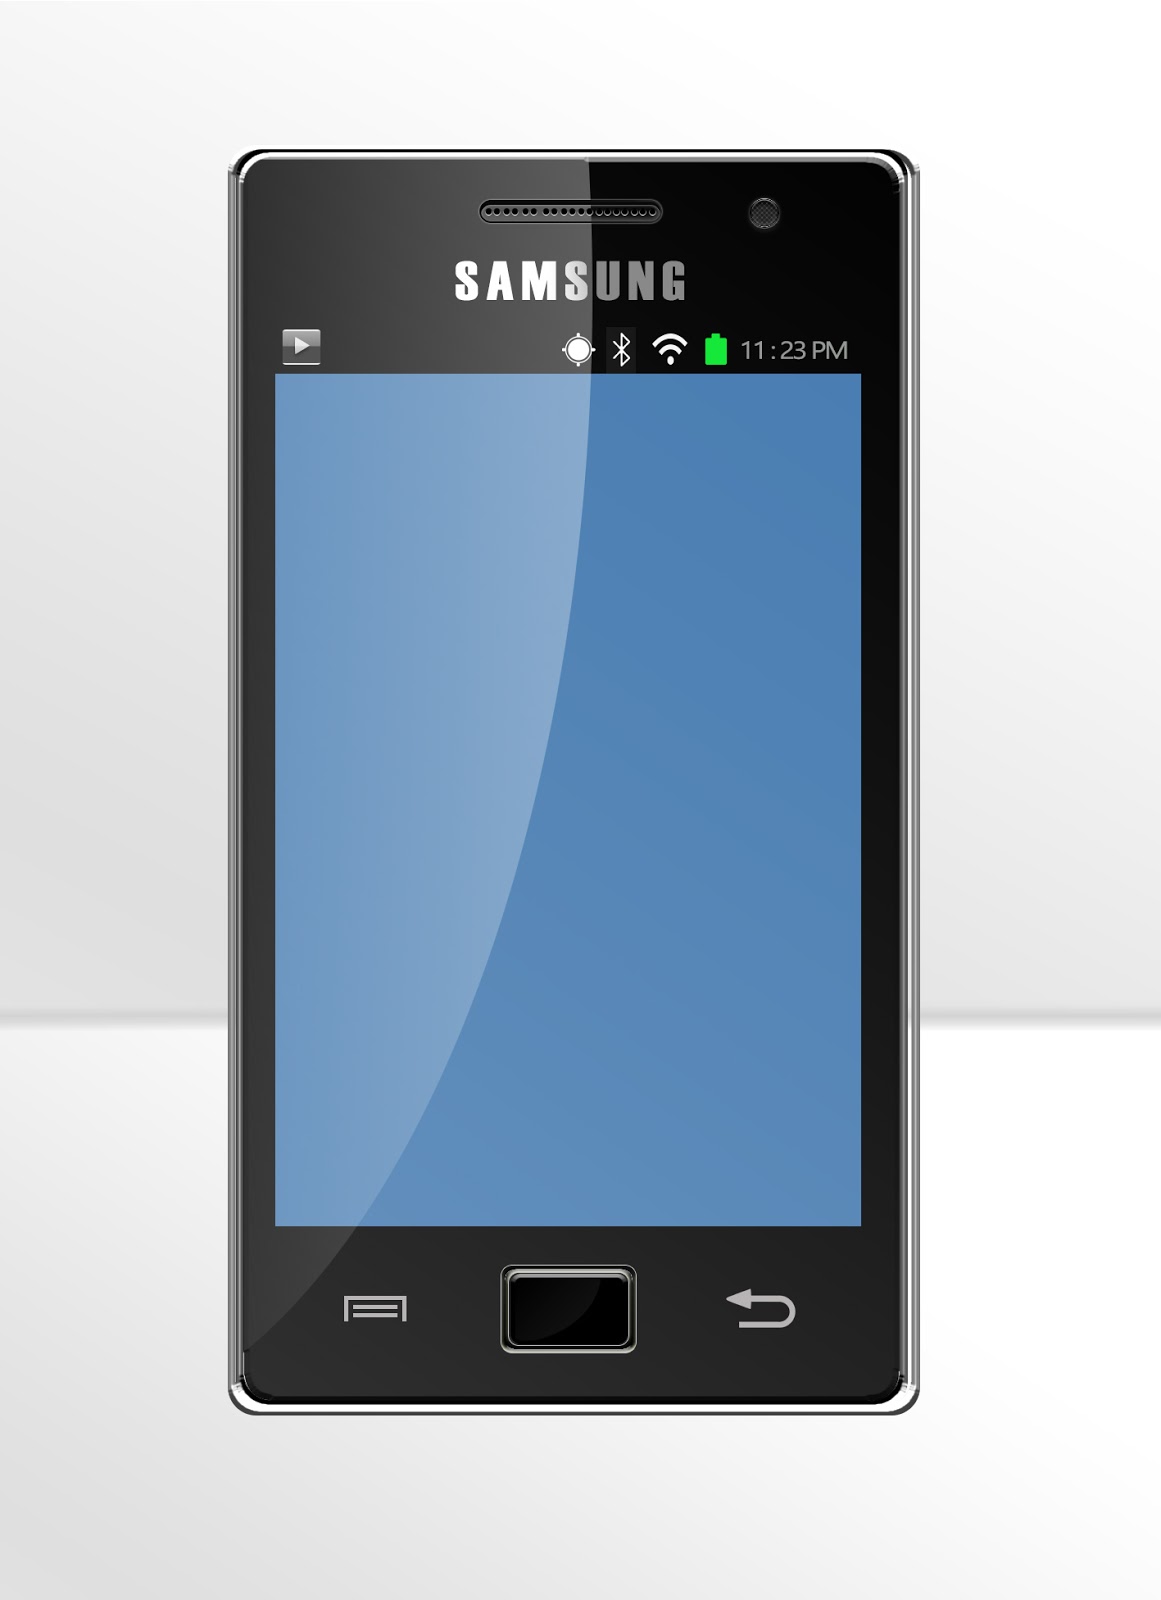
so tin forcefulness out nosotros hold back to the concluding number :: good hither it is
so tin forcefulness out nosotros hold back to the concluding number :: good hither it is

so this isnt the concluding number . dah!!
this is usage 1
so lets start
------------------------------------------------------------------------------------------------------------
Step 1 :
Open a novel icon alongside 60 * 100 cm

Go to " view " >> then choose ruler to exhibit it

Then pick your dimension " hint : what you lot volition encounter is aplicable to anything whatsoever dimension "
as well as larn to the upper as well as the side of the ruler as well as exercise similar the pic

------------------------------------------------------------------------------------------------------------
Step 2 :
Now grap the " rounded rectangular " tool

similar this :

that is a shape .... duplicate it : some other layer:
But you lot volition larn inwards smaller to stand upwards for the porder
decrese its dimensions similar the pic


then paint the last layer with some other color
so you click on this icon
so you click on this icon

douple click may live as well as change the color
it volition live similar that

as well as thence select the layer and rasterize it as well as do that to the other i ,rasterize it too

then select the 2 layers as well as merge them

then choose the " quick select " tool

select the minor layer as well as delete it


as well as thence right click on it , direct Blending Options

Then exercise similar what the moving painting says

then double it too
make it smaller similar what you lot did first
make it smaller similar what you lot did first

then blending options as well as exercise that

that,s close 2 or 3 layer thence i added to a folder "outfit".
select them as well as press on the folder symbol down
------------------------------------------------------------------------------------------------------------
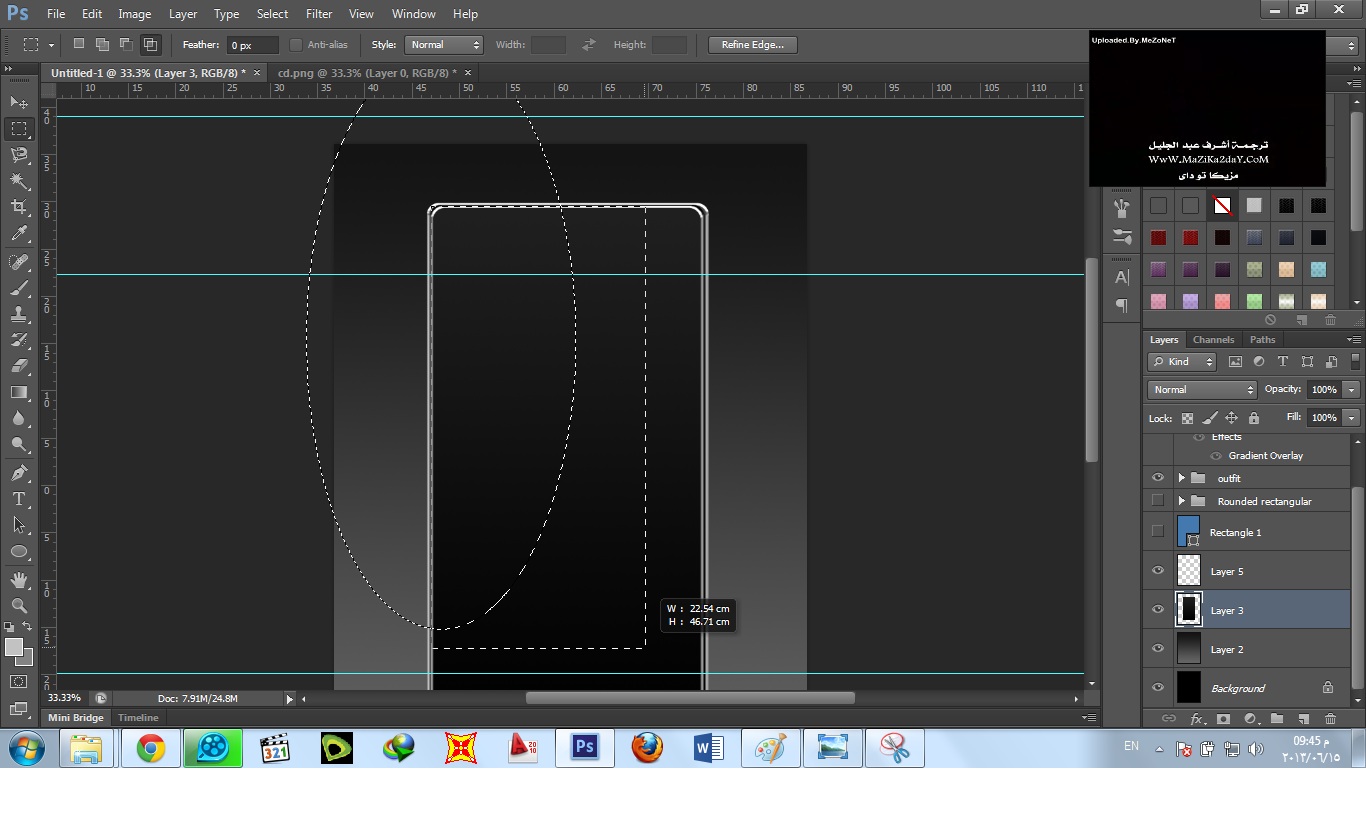
Step 3 :
make a novel layer as well as larn inwards beneath the other layers

right away take the rectangular tool as well as select the outfit layers call back ?!
like the photograph here
like the photograph here


now select slope tool and select dark color and other lighter color
then exercise similar the photo


then direct maintain the ruler as well as make lines for the screen

as well as thence from the rectangular tool brand a bluish cover within the borders you lot made


after that it volition live similar that

------------------------------------------------------------------------------------------------------------
Step iv :
Now make lines past times the ruler similar this to brand the other parts of the phone

as well as thence make a rounded rectangilar inwards the top of the outcry upwards similar that

as well as thence brand these blending options


as well as thence brand some circles " minor ones "
and adjust it similar that


Now from text tool write the company label if at that topographic point is , ofcourse at the overstep of the phone

as well as from blending options brand the folowing

------------------------------------------------------------------------------------------------------------
Step v :
Remember the former layer nosotros made :
that i !
that i !

yeah select it afterward you lot hide the bluish screen
then choose the circle marquee tool and make a circle similar that
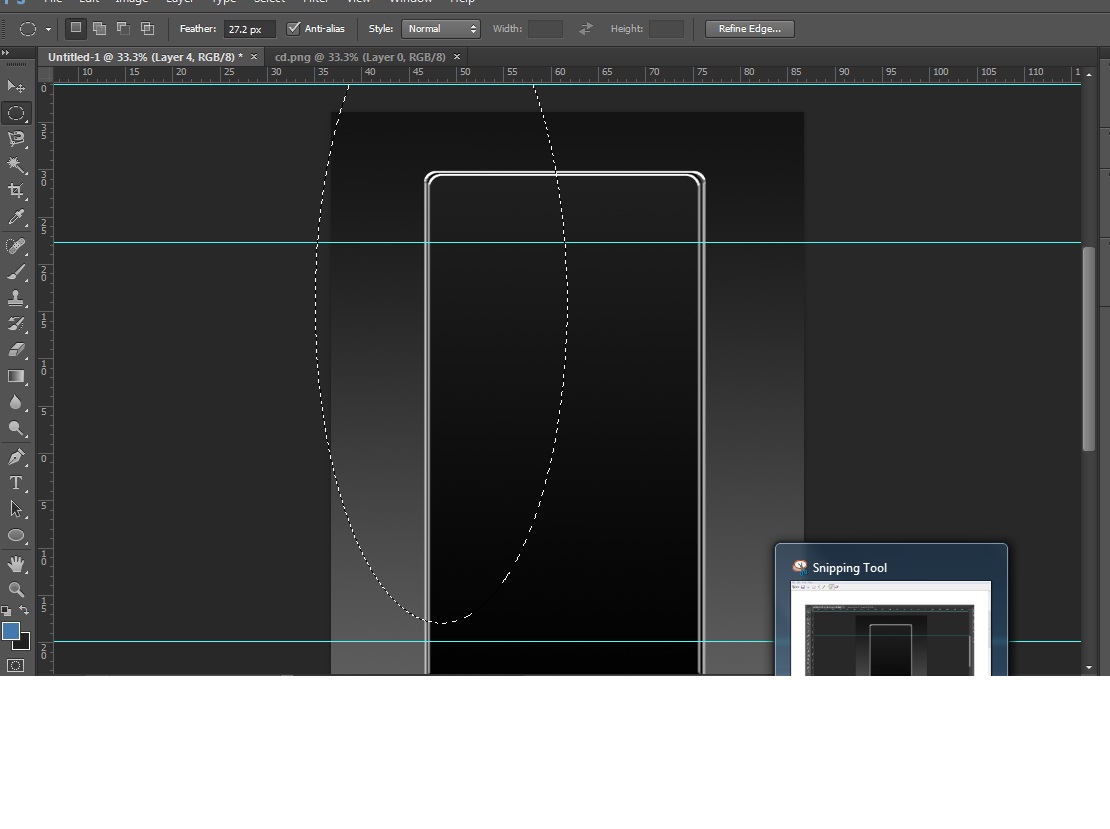
but earlier that call back to make the plumage to zero

and direct " intersect alongside selection "
similar that

after you lot direct the rectangular
you make a rectangle closed to the edge of the phone
similar that
that volition live the result

from the gradient tool brand a slope similar below as well as thence CTRL + Delete

Now exhibit all your layers back
as well as type the clock

and past times the rounded rectangular make


so every matter is easier to grip alongside the shapes thence whatsoever matter else i volition simply exhibit the photos only
right away seat the Wi-Fi symbol
you tin forcefulness out detect these symbol here

or you lot tin forcefulness out pattern them


------------------------------------------------------------------------------------------------------------
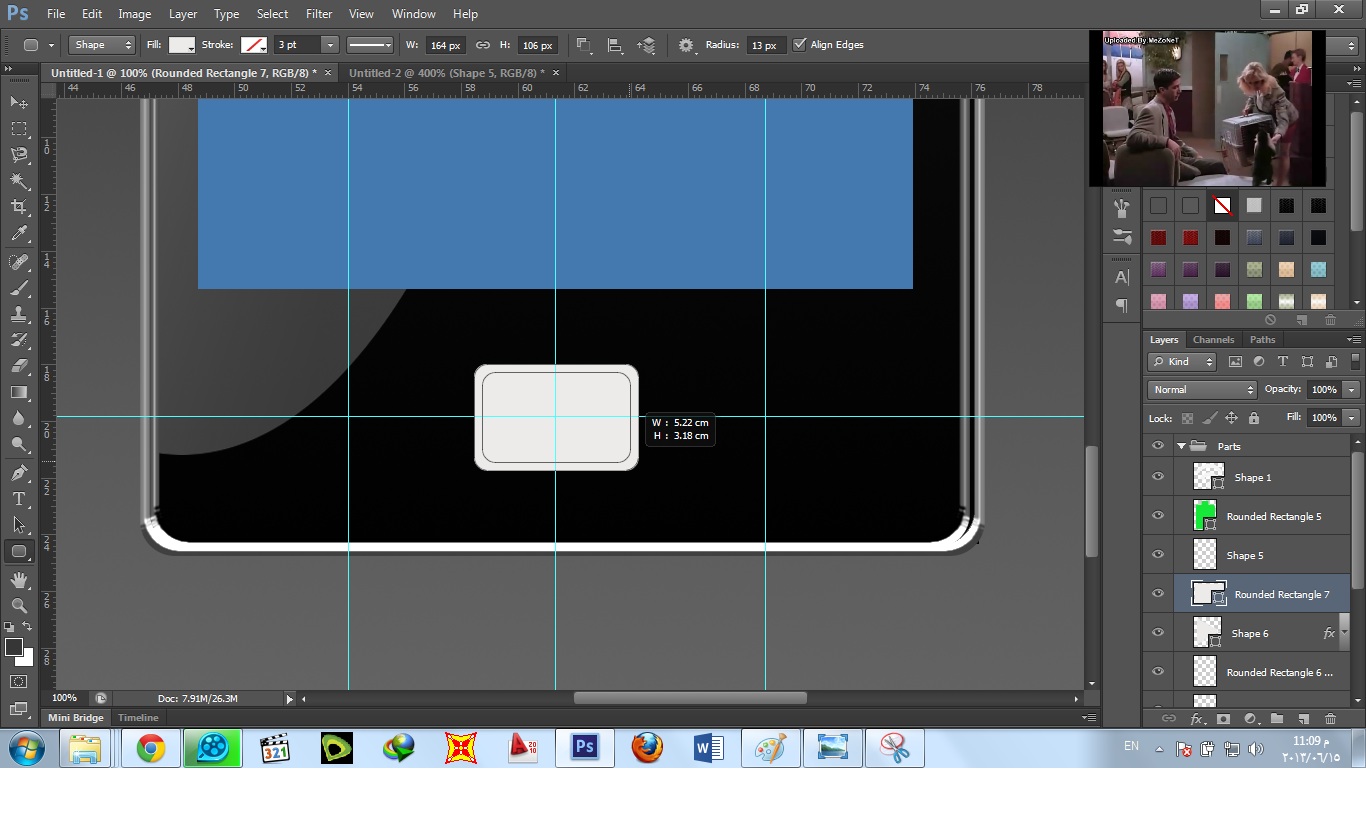
Step half dozen :
right away nosotros caput to brand the media symbol
make a rectangle inwards the left side similar that

and duplicate it but trim the summit of the novel one similar that

from the " blending options "
exercise similar that

right away from shapes brand a triangle shape as well as brand these settings

Now caput for the bottom as well as mark the locations of the buttons parts

starting fourth dimension inwards the middle make a rectangle like that

remeber what nosotros did at the starting fourth dimension matter ?! to the outfit??
we are gonna exercise it again
first duplicate it as well as reduce its dimensions
then rasterize and merge them
get the quik selection as well as delete the inner layer of course of written report afterward you alter its color
similar that::

as well as thence apply this

Now brand this symbol

and add together it here

then brand the arrow as well as house it downwards there

then make a circle as well as thence apply the plendig options similar that


And that is the response for Part 1


0 komentar
Posting Komentar