Making a displacement map to your photos is i of the nearly icredible Techs yous could apply on
PHOTOSHOP
hence This is the concluding respond as well as it could move dissimilar equally yous would run into inwards the terminate of the Post

It is expert beleive me
So lets Start :
------------------------------------------------------------------------------------------------------------
Step 1 :
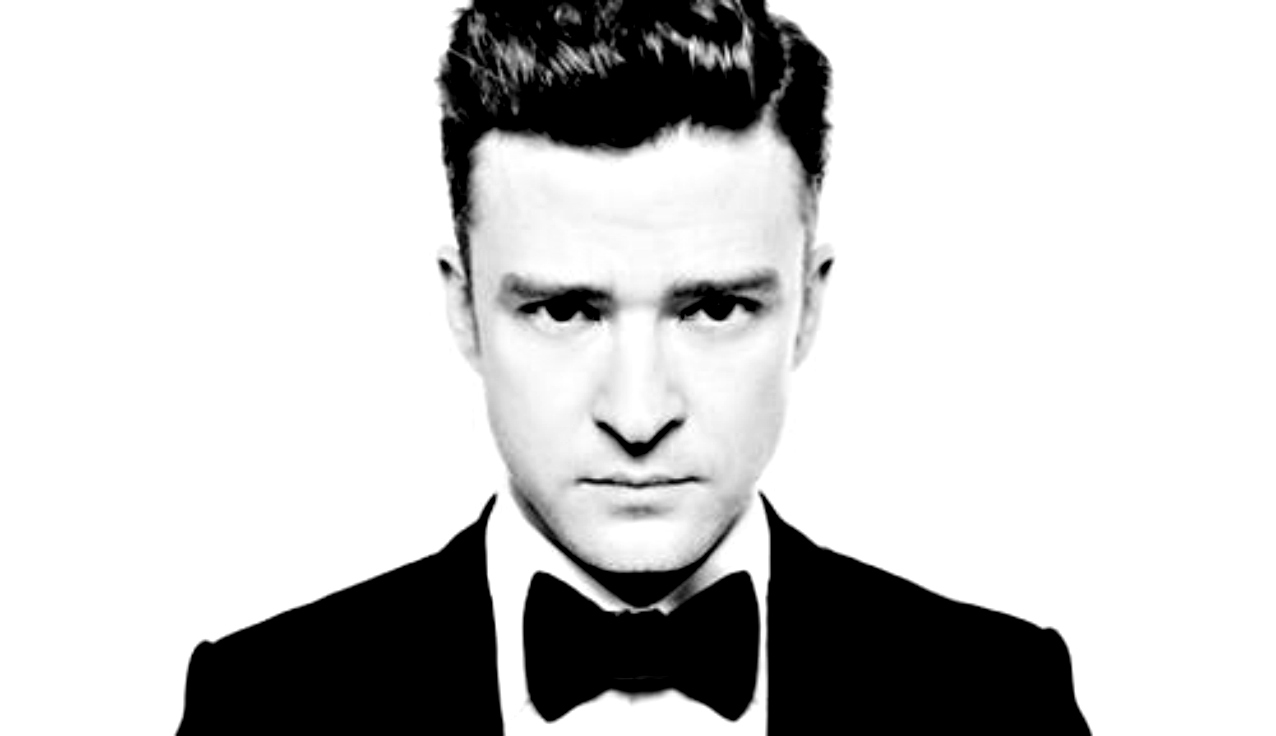
Open your photo
And your Country Flag

together inwards i file But move certain that the flag layer is higher upward the the photo

Hide the Flag Layer hence move alongside your photo
first of all
you are going to desaturate your photograph colors if its colored
from Image >> Adjustments >> Desaturate
After that nosotros are going to brand the white color whiter as well as too the black
color
so from Image >>> Adjustment >>> Levels
like that
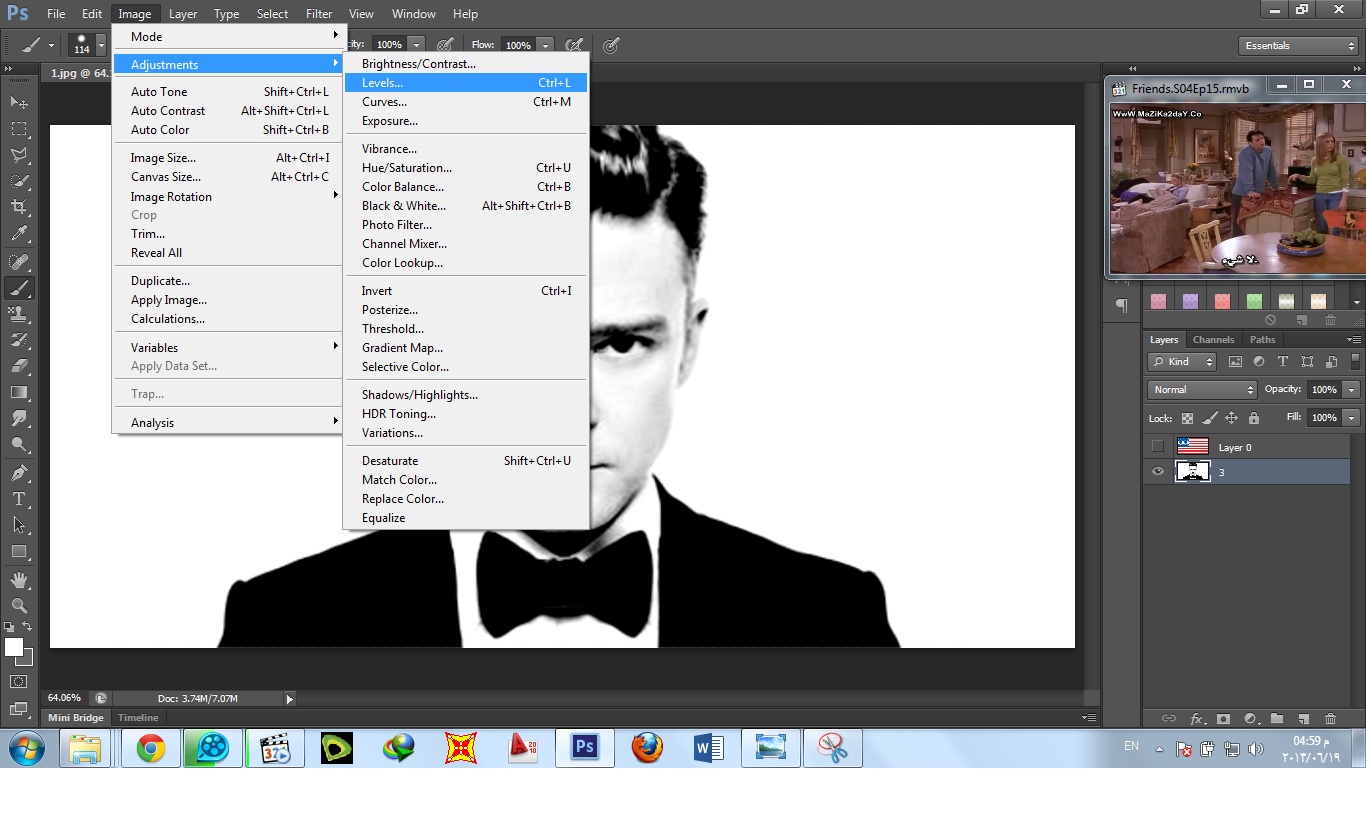
and hence pull the arrow inwards the correct to left as well as the same to the left arrow
that volition brand colors to a greater extent than tense

After that duplicate that layer as well as from Filter >>> Blur >>> Gaissian Blur
like that

Then OK and salve that as MAP.PSD
Then delete that blured photo
Or yous powerfulness non duplicate it as well as blur it straight as well as later saving it yous could
CTRL+ALT+Z
to recover the original desaturated photo

It volition Be similar that

------------------------------------------------------------------------------------------------------------
Step 2 :
Now show the Flag Photo as well as create the following

From Filter >>> Distort >>> Displace
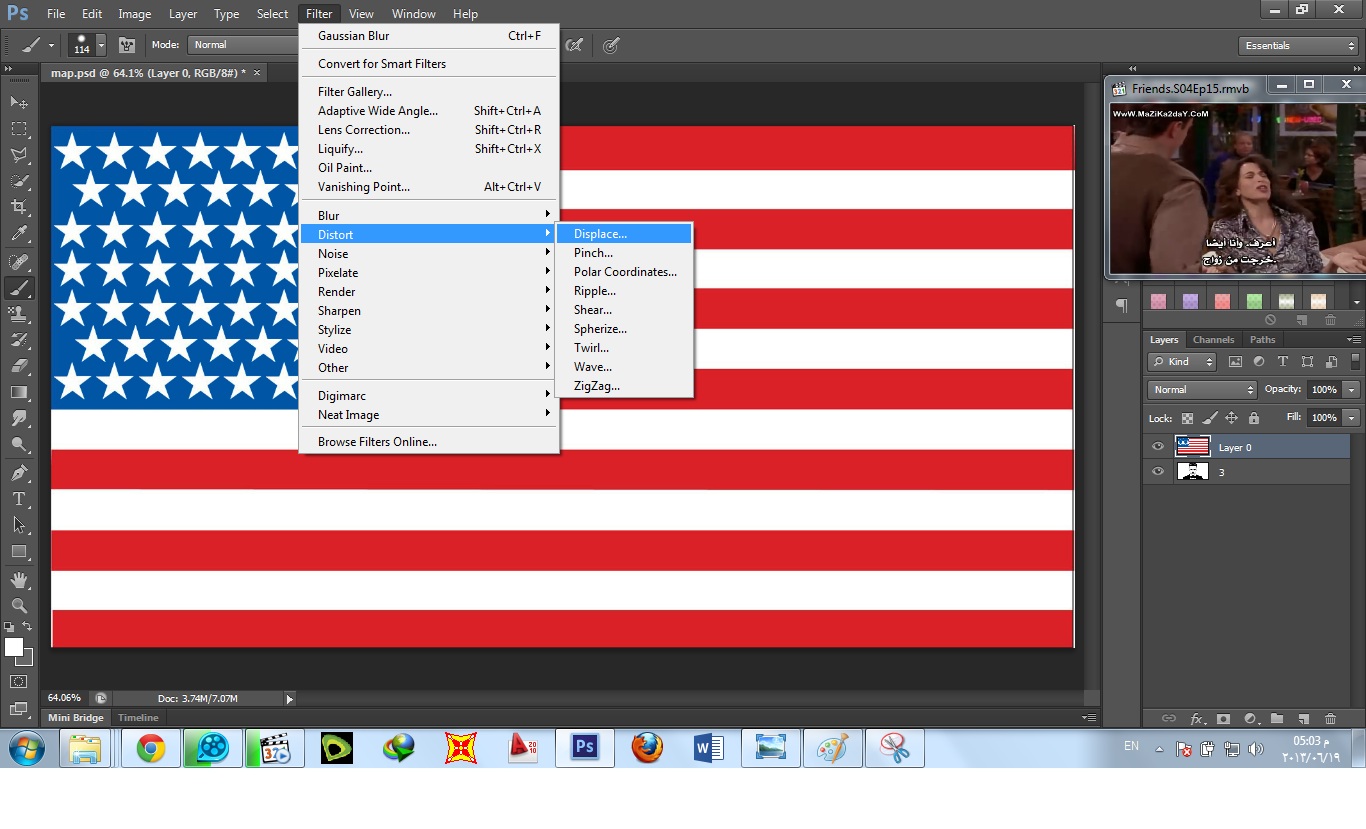
It volition Show a card yous tin play alongside the Numbers But it actually doesnt matter
Press OK , hence it volition exhibit a Window where yous tin opened upward the Map File that you
just
saved from .
Select it as well as Press Open

The Result Will move similar that

I dont know , Maybe yous only move out it similar that
Or yous could change the flag layer Blend Mode into Darken
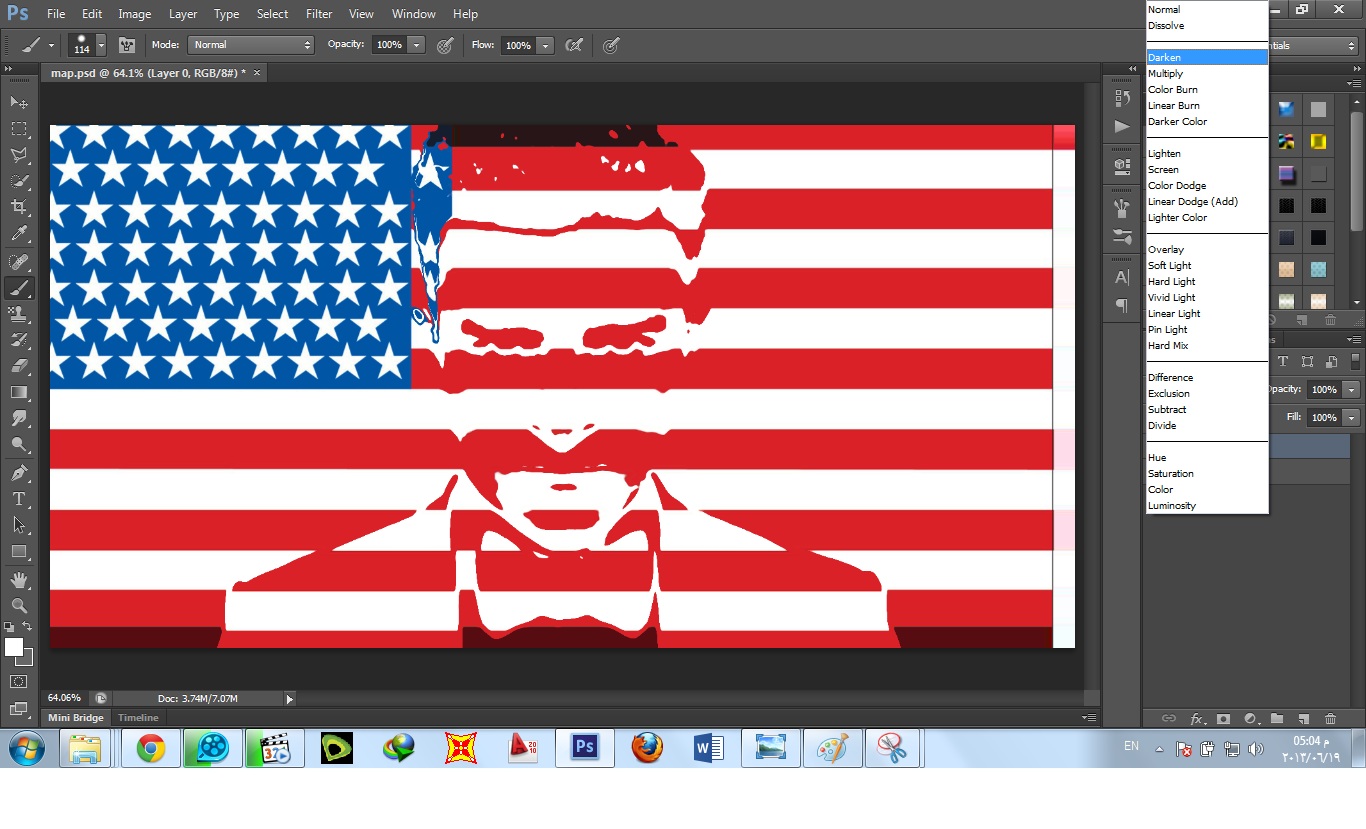
It volition move similar that

Changing its Modes is really helpfull here
It gives yous lots of perfect results like that when I changed the Mode to
Color Burn

Or Linear Burn >> it volition become far tense than Darken

But nosotros tin benifit from all of these past times adding Depth of Field
I volition Show you
First duplicate the two layer the flag and the photo

After Hiding the novel 2 images merge the one-time 2 layers
select the one-time 2 layers hence >>>>Right Click >> Merge Layers .

Remember that the old flag layer is inwards Color Burn blend manner . ok!!
Now change the novel flag layer mode to Linear Burn

hence select the flag as well as the photograph layer as well as merge them

Now nosotros bring 2 layer similar to each other
But the lower degree was inwards Color Burn mode
And the other was inwards Linear Burn
but Not anymore Because nosotros merged them .
Now Grab the eraser

hence erase over the face inwards the upper layer which was inwards Linear Burn

To move that

And hither Our Final Result
maybe yous tin add together about effects equally yous like

Thank you
And shout out back to like and share


0 komentar
Posting Komentar